Ubuntu 12.04 – Install Solr 4 with Jetty 9
This tutorial requires that Jetty is installed as described at http://pietervogelaar.nl/ubuntu-12-04-install-jetty-9.
In this tutorial we use an example project named “airport” and a core named “flight”.
cd /opt
wget http://apache.hippo.nl/lucene/solr/4.0.0/apache-solr-4.0.0.tgz
tar -xvf apache-solr-4.0.0.tgz
cp apache-solr-4.0.0/dist/apache-solr-4.0.0.war /opt/jetty/webapps/solr.war
cp -R apache-solr-4.0.0/example/solr /opt
Optionally you can copy the “dist” and “contrib” folder as while if you want to use the data import handler for example:
cp -r /opt/apache-solr-4.0.0/dist /opt/solr
cp -r /opt/apache-solr-4.0.0/contrib /opt/solr
Add to the bottom of /etc/default/jetty this line:
JAVA_OPTIONS="-Dsolr.solr.home=/opt/solr $JAVA_OPTIONS"
Add a Solr core, as example copy the core “flight” of the airport project (change the example source path of the cp command to your actual path) to /opt/solr and prefix the core with the project name:
cp -r /home/openpanel-admin/sites/www.example.com/data/solr/flight /opt/solr/airport-flight
Because Solr runs as a war file in Jetty, it will run as the Jetty user named “jetty”. Set that user as the user/group of the Solr core directory:
chown -R jetty:jetty /opt/solr/airport-flight
Make sure that the dist and contrib paths are correct in the config of the core:
nano /home/openpanel-admin/sites/www.example.com/data/solr/flight
nano /opt/solr/airport-flight/conf/solrconfig.xml
All lib directories are relative from the instance path “/opt/solr/airport-flight”. The “dist” and “contrib” folders are in “/opt/solr”, so the paths must become:
<lib dir="../dist/" regex="apache-solr-dataimporthandler-.*\.jar" />
Make sure you change ALL lib nodes in this XML file!
Edit /opt/solr/solr.xml and make the node “cores” look like below. Optionally you can comment the default core “collection1″ to disable it. The default core is set in the attribute “defaultCoreName” of the “cores” node.
<!--<core name="collection1" instanceDir="collection1" />-->
<core name="airport-flight" instanceDir="airport-flight" />
</cores>
Set the correct owner/group on the Solr directory:
chown -R jetty:jetty /opt/solr
Check the Jetty settings to verify that everything is correct:
/opt/jetty/bin/jetty.sh check
Restart Jetty:
service jetty restart
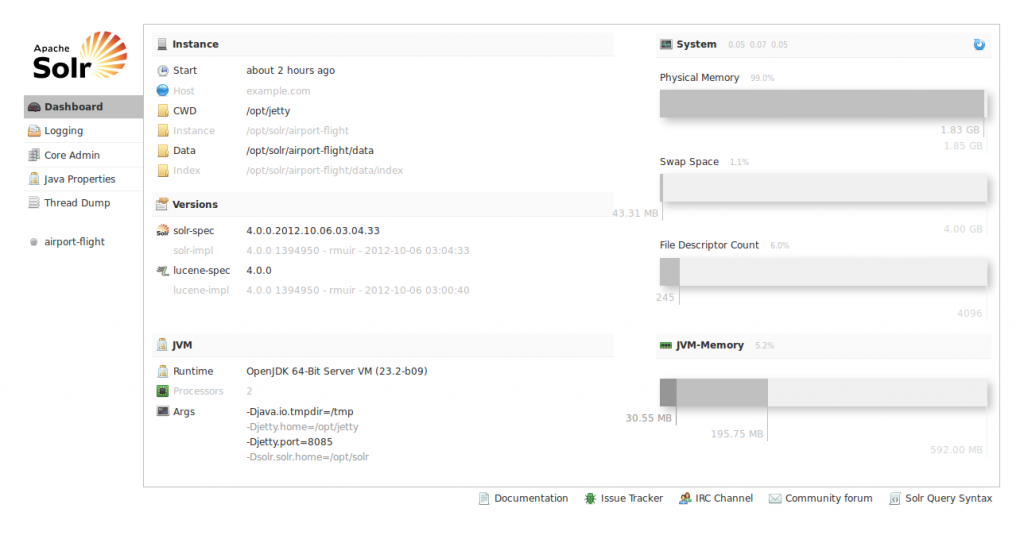
Everything should be working! Visit in your browser the url where Jetty is located and add /solr as path, probably: http://example.com:8085/solr. You should see the nice Solr admin interface.
DataImportHandler with MySQL
There is a good change that you choose a MySQL JDBC connector in your DataImportHandler script. But the connector is probably not installed yet. Execute the following command to install the MySQL connector:
apt-get install libmysql-java
Check where it is installed:
dpkg-query -L libmysql-java
Create a symlink:
ln -s /usr/share/java/mysql-connector-java.jar /opt/jetty/lib/ext/mysql-connector-java.jar
Restart Jetty:
service jetty restart
The DataImportHandler should now be able to use the connector to create a database connection.
Core update automation
In the future your Solr core configuration in the core/conf folder is likely to change as all software does. To automate the process of updating a core conf in Solr a bit, create the following script:
nano /opt/solr/core-update-conf.sh
if [ "" = "$1" ]; then
echo "Please enter the core which conf directory must be updated"
read CORE
else
CORE=$1
fi
if [ "airport-flight" = "$CORE" ]; then
echo "Updating core \"$CORE\"..."
rm -rf /opt/solr/airport-flight/conf
cp -r /home/openpanel-admin/sites/www.example.com/data/solr/flight/conf /opt/solr/airport-flight/conf
chown -R jetty:jetty /opt/solr/airport-flight
echo "done"
echo "Reloading core in Solr"
wget \-q \-O /dev/null "http://localhost:8080/solr/admin/cores?wt=json&action=RELOAD&core=airport-flight"
echo "done"
elif [ "collection1" = "$CORE" ]; then
echo "Updating core \"$CORE\"..."
echo "done"
else
echo "Unknown core"
fi
Give only root permissions for this file (it probably is the owner already):
chown root:root /opt/solr/core-update-conf.sh
Give the file execution rights:
chmod u+x /opt/solr/core-update-conf.sh
Execute the file if you are in /opt/solr with:
./core-update-conf.sh
or
sh core-update-conf.sh
Authentication with Nginx
Authentication is possible in several ways. In Jetty itself, Apache proxy, Nginx proxy, etc. I used Nginx, because it’s fast and very easy to configure.
In this example I will show basic authentication (plain username & password). Because the credentials are sent plain over the internet it’s strongly recommended that you use a SSL (https) connection to encrypt this data. The Nginx server block below listens both on port 80 and port 443 (SSL). In the firewall of the server, I closed the Jetty port that I have configured on port 8085. So Solr will only be accessible through port 80 and 443 that Nginx handles with authentication. With the security of SSL you loose about 0.04 seconds in response time. Access through Nginx proxy or direct Jetty access is really about the same response time.
Create /opt/solr/.htpasswd for the admin username to access the Solr admin:
cd /opt/solr
htpasswd -cm .htpasswd admin
Create /opt/solr/.htpasswd-airport for the airport username to access the airport core:
cd /opt/solr
htpasswd -cm .htpasswd-airport airport
Put the admin user also in the .htpasswd-airport file to have manipulation access on this core from the Solr admin.
cat .htpasswd >> .htpasswd-airport
Nginx server block example for Solr authentication:
server {
    server_name example.com;

    listen 80;
    listen 443 ssl;
    ssl_certificate      /etc/ssl/certs/example_com.pem;
    ssl_certificate_key  /etc/ssl/private/example_com.key;

    location ^~ /solr/airport- {
        # Solr core is available with or without SSL, but SSL is strongly recommended
        # to encrypt basic authentication data when not on the same host!

        auth_basic            "Restricted core";
        auth_basic_user_file  /opt/solr/.htpasswd-airport;

        proxy_set_header X-Forwarded-Host $host;
        proxy_set_header X-Forwarded-Server $host;
        proxy_set_header X-Forwarded-For $proxy_add_x_forwarded_for;
        proxy_pass http://localhost:8085;
    }

    location ^~ /solr {
        # Force SSL for Solr admin access
        if ($ssl_protocol = "") {
            return 301 https://$server_name$request_uri;
        }

        auth_basic            "Restricted Solr admin";
        auth_basic_user_file  /opt/solr/.htpasswd;

        proxy_set_header X-Forwarded-Host $host;
        proxy_set_header X-Forwarded-Server $host;
        proxy_set_header X-Forwarded-For $proxy_add_x_forwarded_for;
        proxy_pass http://localhost:8085;
    }
}
